
Introduction:
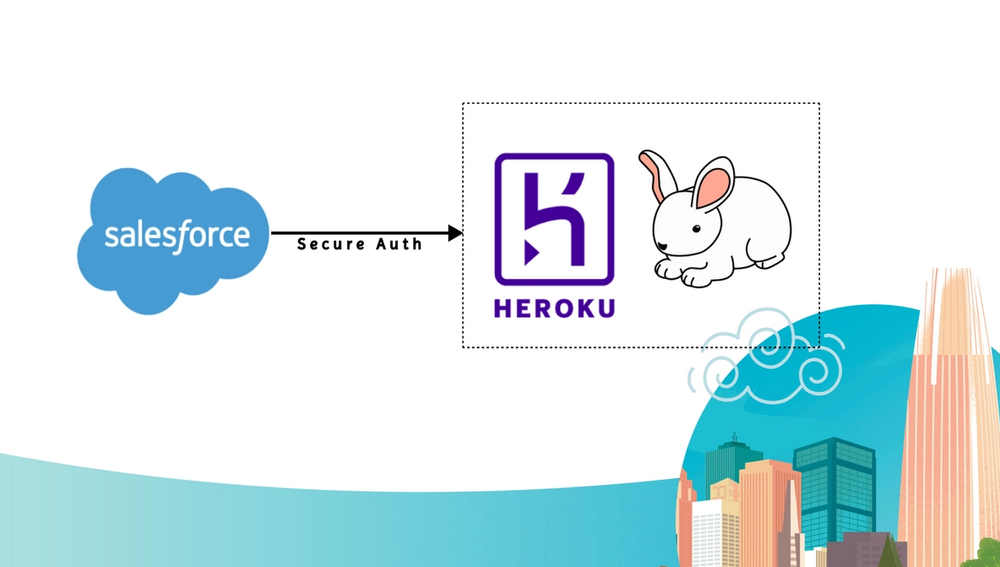
In the dynamic world of cloud computing, the seamless integration of different platforms is essential for efficient and secure data flow. When it comes to connecting Salesforce Apex with AWS or Heroku and ensuring secure data transmission, RabbitMQ emerges as a powerful tool. In this blog post, we will explore how RabbitMQ can be leveraged to streamline integration, particularly when asynchronous processing is a key requirement.
The Challenge:
When tasked with executing work on AWS or Heroku from Salesforce Apex, a common challenge arises in ensuring not only the security of data transmission but also optimizing the processing workflow. The traditional approach might involve creating a REST API on Heroku or AWS, but this can sometimes introduce complexities and overhead.
The Solution:
Enter RabbitMQ – a robust message broker that facilitates communication between distributed systems. By incorporating RabbitMQ into the integration architecture, organizations can enhance the efficiency of data transmission and processing, particularly in scenarios where asynchronous execution is crucial.
Advantages of RabbitMQ in Salesforce Integration:
- Asynchronous Processing:
RabbitMQ excels in handling asynchronous communication. This proves invaluable when tasks need to be performed on Heroku or AWS independently, allowing Salesforce to continue its operations without waiting for the external processing to complete. - Data Security:
Security is paramount when transmitting data between platforms. RabbitMQ supports secure communication protocols, ensuring that sensitive information is transferred with encryption, reducing the risk of unauthorized access. - Eliminating REST API Overhead:
Instead of creating a REST API on Heroku or AWS, which can sometimes be cumbersome and time-consuming, RabbitMQ simplifies the communication process. It acts as a middleware, efficiently passing messages between Salesforce Apex and the processing units on Heroku or AWS. - Scalability:
RabbitMQ's scalable architecture allows for the seamless expansion of the system as the demand for processing power grows. This ensures that the integration remains effective even as data volumes increase.
Implementing RabbitMQ for Salesforce Integration:
- Setup RabbitMQ:
Begin by setting up RabbitMQ as the messaging middleware. This involves installing and configuring RabbitMQ on a server that is accessible to both Salesforce and the processing units on AWS or Heroku. - Define Message Queues:
Clearly define the message queues that will facilitate communication between Salesforce Apex and the processing units. This includes specifying the types of messages, their format, and the routing mechanisms. - Integrate Salesforce with RabbitMQ:
Utilize Salesforce Apex to interact with RabbitMQ. Working gist is provided below. - Implement Processing Logic:
Develop the processing logic on AWS or Heroku to consume messages from RabbitMQ. As messages are received, the required tasks can be executed asynchronously, optimizing the overall workflow.
Conclusion:
In conclusion, RabbitMQ presents an elegant solution for organizations seeking to integrate Salesforce Apex with AWS or Heroku in a secure and asynchronous manner. By leveraging RabbitMQ's capabilities, the complexities associated with creating REST APIs on external platforms can be mitigated, leading to a more streamlined and efficient integration process. As the demand for scalable and secure cloud integrations continues to grow, RabbitMQ stands out as a valuable tool in the arsenal of modern developers and architects.
Here is the code (You have to modify this code based on your requirements) which shows how to wrap the data for RabbitMQ. Also in this code serializeAmqpRequests is the key method which is responsible to create desired skeleton to post http request to RabbitMQ.
Also here we are using NamedCredentials so url looks like :
https://toad.rmq.cloudamqp.com may be different in your case and it's Password Authentication with Generate Authorization Header = true. username and password for RabbitMQ located in the add on it self.
1public class RestCallToGenericService {
2    public static Generic_Service_Sync__c postRequestToService(Generic_Service_Sync__c record) {
3        String SERVICE_URL = 'callout:CloudAMQP_SERVICE';
4        String jsonData = record.Data__c;
5
6        HTTPResponse hs = null;
7        Generic_Service_Setting__mdt settings = Generic_Service_Setting__mdt.getInstance('Service_Setting_Record');
8        String rabbitMQUserName = settings.RabbitMQ_UserName__c;
9        String rabbitMQBindingKey = settings.RabbitMQ_Binding_Key__c;
10        String exchangeName = settings.RabbitMQ_Exchange_Name__c;
11
12        try {
13            Map<String, Object> jsonDataMap = (Map<String, Object>) JSON.deserializeUntyped(jsonData);
14            jsonDataMap.put('requestId', record.id);
15            jsonData = JSON.serialize(jsonDataMap);
16
17            HttpRequest httpReq = new HttpRequest();
18
19            String endpoint = SERVICE_URL + '/api/exchanges/' + rabbitMQUserName + '/' + exchangeName + '/publish';
20            System.debug('endpoint' + endpoint);
21            httpReq.setEndpoint(endpoint);
22            httpReq.setMethod('POST');
23            String payload = serializeAmqpRequests(jsonData, rabbitMQBindingKey);
24            httpReq.setBody(payload);
25            Http http = new Http();
26            hs = http.send(httpReq);
27
28            if (hs.getStatusCode() == 200) {
29                record.Status__c = 'Sent to Service';
30                String response = 'Response ' + hs.getBody();
31                String message = response.length() > 32768 ? response.subString(0, 32768) : response;
32                record.Response__c = message;
33                record.Error_Details__c = '';
34
35            } else {
36                Integer statusCode = hs != null ? hs.getStatusCode() : 500;
37                String body = hs != null ? hs.getBody() : 'response is null';
38                String errorDetails = 'Unable to post the request to Service status Code ' + statusCode + ' Body : ' + body;
39                String message = errorDetails.length() > 32768 ? errorDetails.subString(0, 32768) : errorDetails;
40
41                errorDetails.substring(0, 32760);
42                record.Status__c = 'Error';
43                record.Error_Details__c = message;
44                record.Response__c = '';
45            }
46        } catch (Exception e) {
47            Integer statusCode = hs != null ? hs.getStatusCode() : 500;
48            String body = hs != null ? hs.getBody() : 'response is null';
49            String errorDetails = 'Unable to post the request to Service due to FATAL Error - status Code ' + statusCode + ' Body : ' + body + ' stack trace - ' + e.getStackTraceString();
50            String message = errorDetails.length() > 32768 ? errorDetails.subString(0, 32768) : errorDetails;
51            record.Status__c = 'Error';
52            record.Error_Details__c = message;
53            record.Response__c = '';
54        }
55
56        return record;
57    }
58
59    @future(callout = true)
60    public static void postRequestToServiceFuture(String recordId) {
61        Generic_Service_Sync__c record = [SELECT Id, Account__c, Action__c, Service_Record_Id__c, Data__c, Status__c FROM Generic_Service_Sync__c WHERE Id = :recordId];
62        postRequestToService(record);
63    }
64
65    private static String serializeAmqpRequests(String payload, String rabbitMQBindingKey) {
66        rabbitMQBindingKey = rabbitMQBindingKey == null ? '' : rabbitMQBindingKey;
67        JSONGenerator generator = JSON.createGenerator(false);
68        generator.writeStartObject();
69        generator.writeStringField('routing_key', rabbitMQBindingKey);
70        generator.writeFieldName('properties');
71        generator.writeStartObject();
72        generator.writeEndObject();
73        generator.writeStringField('payload', payload);
74        generator.writeStringField('payload_encoding', 'string');
75        generator.writeEndObject();
76        return generator.getAsString();
77    }
78}
79